- 2.0 mm hex wrench or driver
- 2.5 mm hex wrench or driver
- 8 mm nut driver or kit-supplied box wrench
|
| |
1) Begin by removing the wheels using an 8 mm nut driver or the wrench supplied with your Maxx. Remove the 4 mm screw pins (arrowed) to release the front steering hub and rear axle carrier. Also remove the 3x18 button-head that secures the toe link to the steering block.

Remove the wheels 
Unscrew the Steering Blocks 
Unscrew the Axle Carriers
2) Remove the caster block/steering block assembly and rear axle carrier. The female halves of the driveshafts will come out with them.

Remove the Steering Blocks 
Remove the Axle Carriers
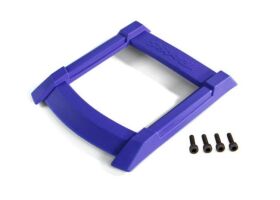
3) The bumpers and skid plates must be removed to access the lower suspension arms. Remove the arrowed 4x25 mm button-head screws. Next, turn the chassis over and remove the 4x10 mm countersunk screws from the front and rear skid plates.

Remove the 4x25 mm Screws 
Remove the 4x25 mm Screws 
Remove the Countersunk Screws
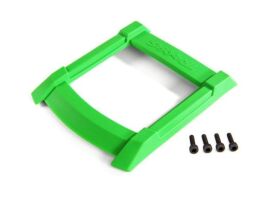
4) Flex the bumper and skid plate up, and pull it away from the chassis. The wheelie bar will come off with the rear skid plate.

Remove the Bumper and Skid Plate 
Remove the Wheelie Bar
5) The arrowed screw pins and a 4x12 mm button-head screw hold the suspension arms in place. Remove the button-head screw and slide the tie bar mount and the metal tie bar off of the suspension pins.

Remove Screw Pins 
Remove the Tie Bar
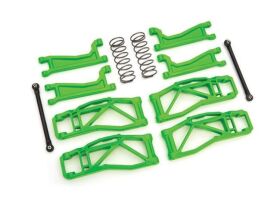
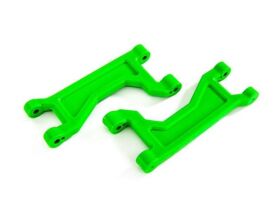
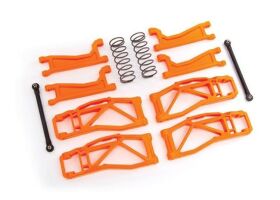
6) Remove the lower suspension arms and pins. Next, remove the screw pins and upper arms. The screw pins and suspension pins will be reused for the WideMaxx arms.

Remove the Lower Suspension Arms 
Remove the Upper Suspension Arms
7) Reverse the disassembly steps to install the WideMaxx arms. The lower arms are labeled LF - RR (Left Front - Right Rear) and RF - LR (Right Front - Left Rear) to help with proper installation. The upper arms are all identical, just flip them over for the proper orientation. The tie bars are labeled F (front) and R (rear), install accordingly.

Lower Suspension Arms 
Suspension Arm Orientation 
Tie Bar Orientation
8) Here are the arms in their correct orientations. The arrows point towards the front of the Maxx.

Right Front 
Right Rear 
Left Front 
Left Rear
9) With the new arms in place, you can now reinstall the steering block/caster block and rear axle carriers. The caster blocks and axle carriers are labeled R and L to indicate right and left, and the driveshaft halves are keyed to maintain correct universal-joint alignment. There are marks in the shafts to show correct alignment, but you can just rotate the female half until it slides over the male half. The shafts only fit together when properly aligned, so its goof-proof.

Reinstall Steering & Caster Blocks 
Parts Labeled Left and Right 
Line Up Driveshafts
10) Reinstall the screw pins to secure the caster blocks and rear axle carriers. Next, reinstall the front and rear skid plates by reversing the previous steps.

Reinstall Caster Blocks 
Reinstall Axle Carriers 
Reinstall Skid Plates
11) Replace the stock toe links with the WideMaxx kits longer versions. Remove the button-head screw that secures the toe link and install the new link. Note that the toe links have a different type of hollow ball in each end. The end with the taller, hourglass-shaped hollow ball is the bellcrank end.

Replace Stock Toe Links 
Install WideMaxx Toe Links 
Hollow Ball Orientation
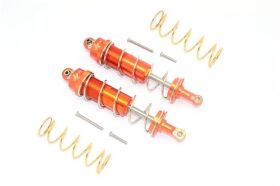
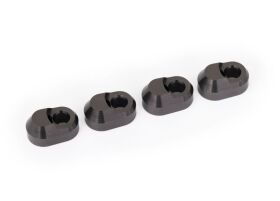
12) The longer WideMaxx arms call for stiffer springs, which are included with the kit. The springs are blue, indicated by a spot of blue paint on each spring. Install the blue springs on the rear shocks, and replace the front springs with the springs you removed from rear shocks. A screw secures each spring perch. Remove the screw, then push up on the perch and slide it off the shaft to remove the spring. To recap:
-Replace the rear springs with the BLUE springs.
-Move the rear springs to the FRONT shocks.
-The stock front springs are not used.

Replace Springs 
Remove the Old Springs
13) Reverse the steps to install the new spring. Be careful not to mix up the front and rear springs when swapping them. Reinstall the button-head screws that secure the shocks and toe links, and the WideMaxx Suspension Kit installation is complete!

Install the New Springs 
Reinstall Screws
Now that your Maxx is an extra 1.57 wider, youll experience ever greater stability and high-speed cornering grip.

Standard Maxx 
WideMaxx